

Automate and Conquer: Crafting an End-to-End CI/CD Pipeline for Spring Boot application using Jenkins


Table of contents
Overview
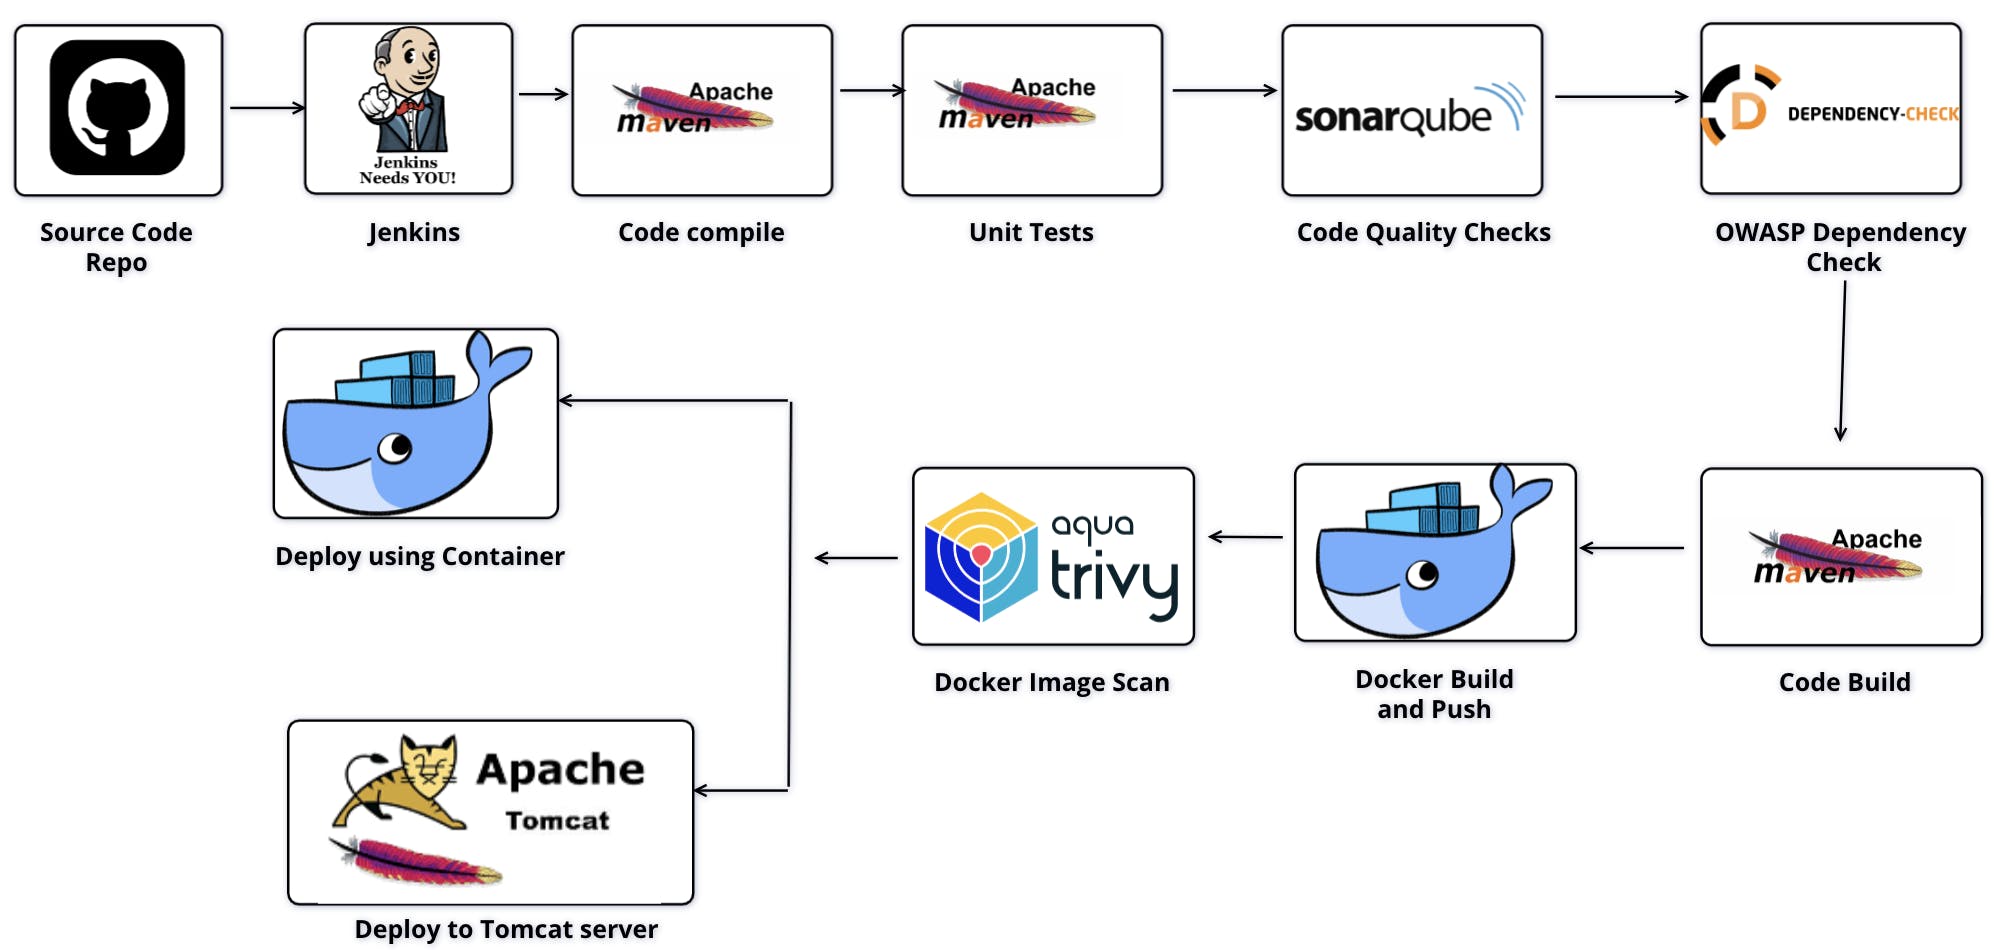
In this exciting Real Time CI/CD DevOps Project, we'll create an end-to-end CI/CD pipeline to build and deploy a real-world Spring Boot application. We'll leverage the power of Jenkins, a popular CI/CD tool, and other essential DevOps tools like GitHub, Apache Maven, Sonarqube, OWASP Dependency Check, Docker, Aqua Trivy, to automate the entire process from code compilation to deployment. This is a whole DevSecOps process using which we will build and deploy our application. We are going to deploy our application in two ways: (i) Deploy using Docker container, (ii) Deploy using Tomcat Server.
Along with the steps I am also going to discuss some errors that I encountered and how can you resolve those errors if you run into the same along the way.
Let's dive in and see how it's done!
Implementation
Source Code Repo
We will keep our source code inside a repository in GitHub. You can check this repository: https://github.com/komal-max/Builld_and_deploy_APP.
GitHub is a code hosting platform for collaboration and version control. It lets you (and others) work together on projects. To learn more about GitHub check the documentation here: https://docs.github.com/en
Jenkins
Next, we'll configure Jenkins, the heart of our CI/CD pipeline. Jenkins is an open-source automation server that helps automate the build, test, and deployment processes. Install Jenkins on your server or local machine and access it via the web interface. I installed Jenkins on my local machine on port 8080 and access it using URL: http://localhost:8080/
If not already installed, please follow documentation: https://www.jenkins.io/download/lts/macos/
use commands:
brew install jenkins-lts
brew services start jenkins-lts
NOTE: You will need to have Homebrew installed on the machine first, if not installed already, check https://brew.sh/ to install homebrew, make sure to run the 3 commands homebrew will mention in "Next Steps" to set the environmental variables for the Brew app. If you want to see where the environmental variables are, use command:
open -e .zprofile
After Homebrew is installed, run jenkins installation commands mentioned above.
Jenkins will help create a local copy of the source code that we have in GitHub and a copy will be created in Jenkins workspace where it will perform various operations throughout the pipeline.
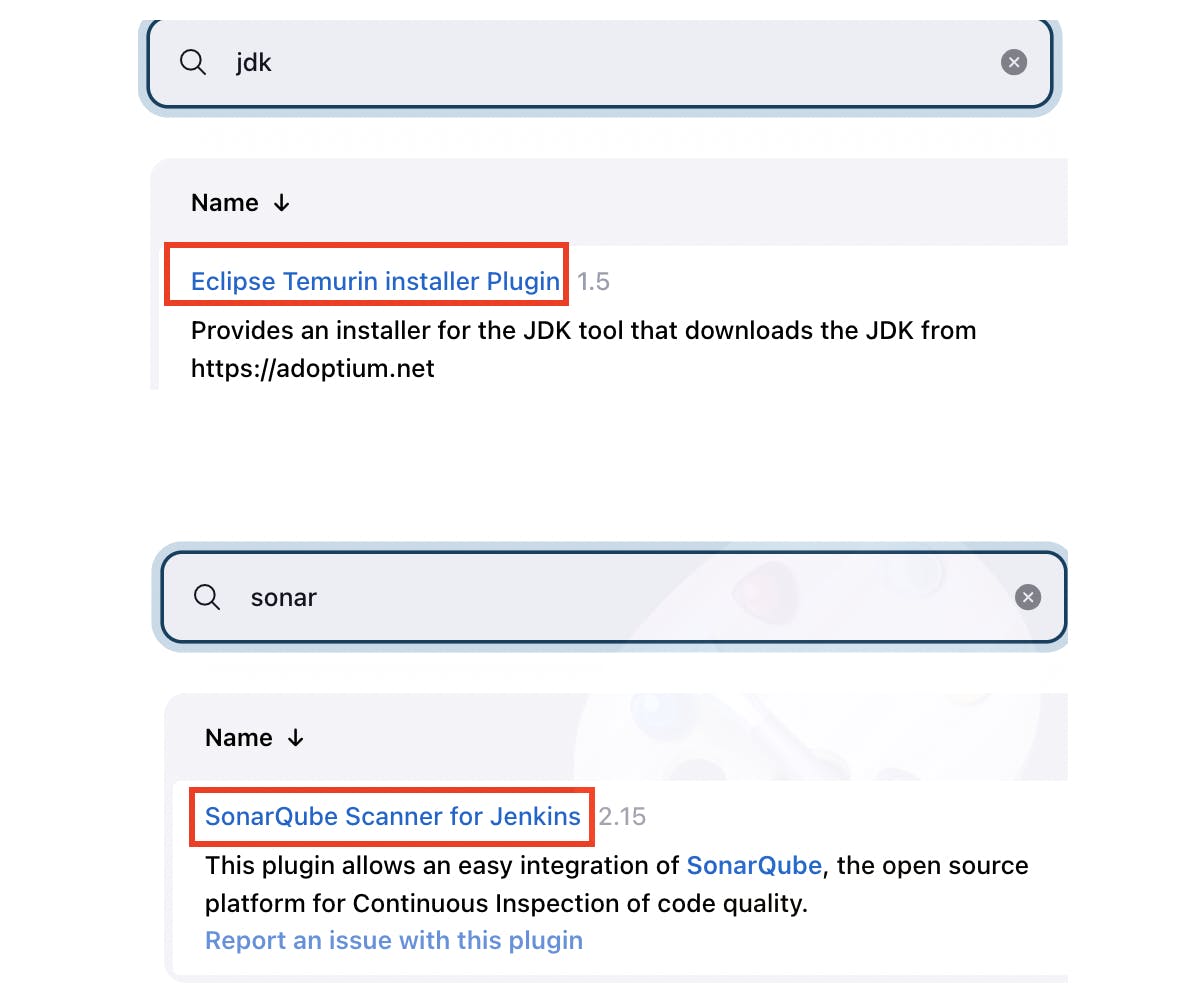
After Jenkins is installed, login to Jenkins > Manage Jenkins > Manage Plugins (make sure you have installed JAVA and Maven) > Available Plugins > install Eclipse Temurin installer and then click on Install without restart.
As we are going to do code quality check as well, install SonarQube Scanner plugin too using the same way as mentioned above.
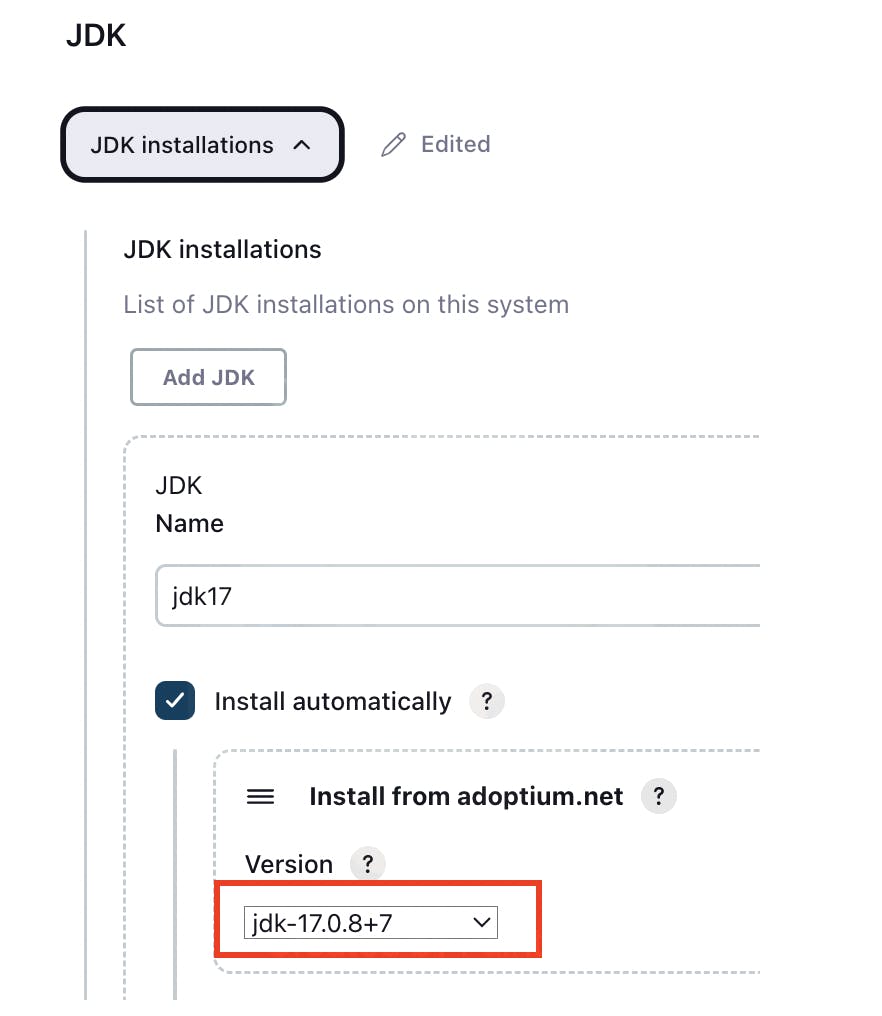
After installing Plugins, go to Manage Jenkins > Tools > Search for JDK installations > give a name expample- jdk17 > Click on Install automatically and then in Add Installer, select Install from adoptium.net and select version jdk-17.0.8+7 (you can select any version of 17 series)
Follow the same steps for Maven, we will install Maven 3 and version 3.9.1

After this, go to Jenkins Dashboard and click on Create a job > enter the name of your liking for the job, in my case its Real-time-CICD > select Pipeline (we are going to create a declarative pipleline) > click OK > give a description >check Discard old builds and select Max # of builds to keep to 2, this will help to minimize space usage.
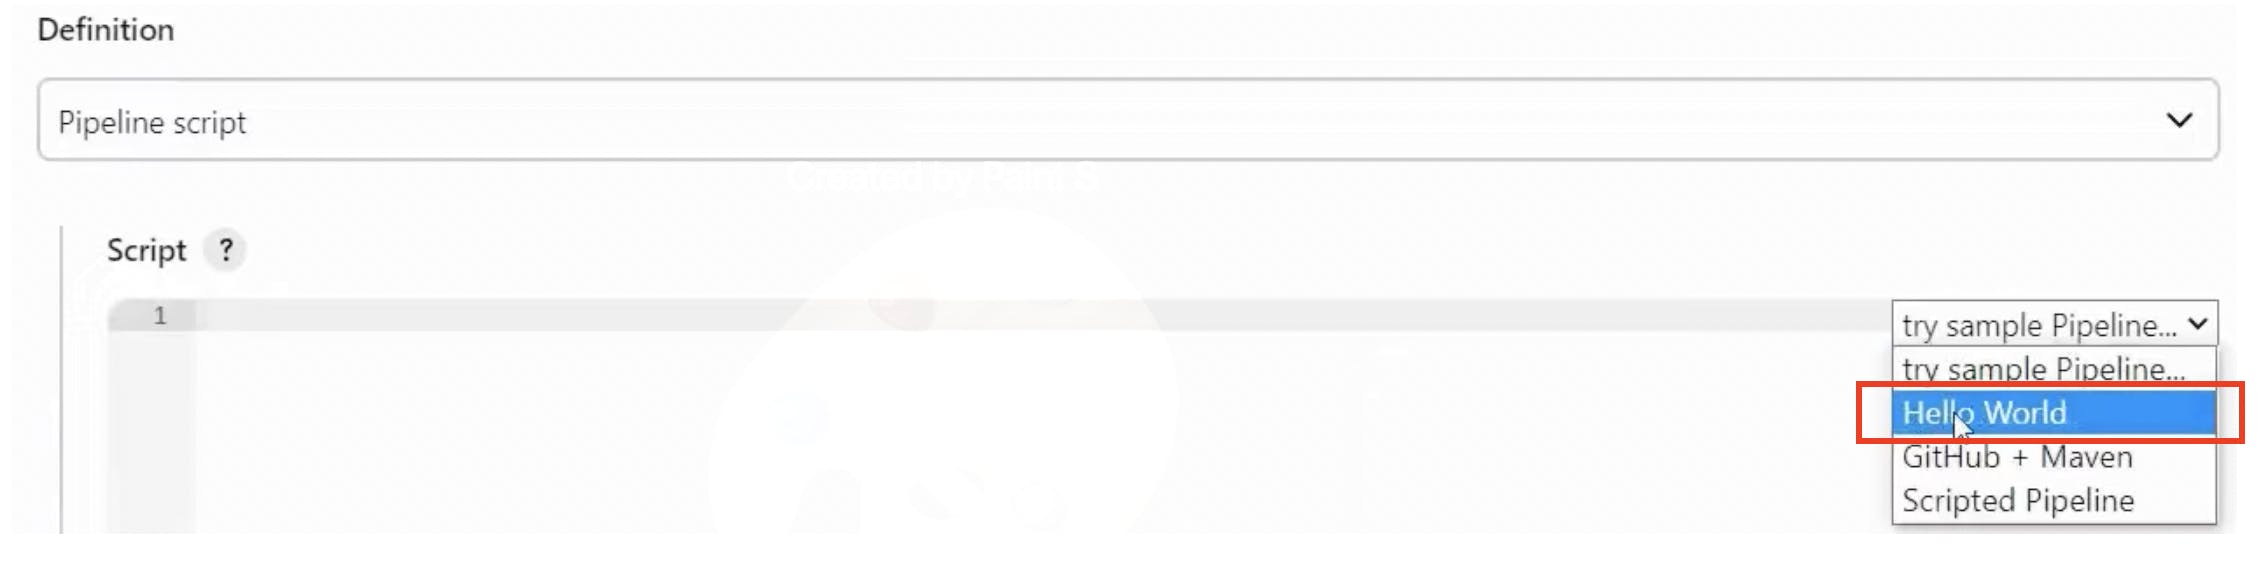
As a next step, we will create a Pipeline script, for ease we can make use of sample pipeline like 'Hello World' to get basic structure of the pipeline and make desired changes to it.
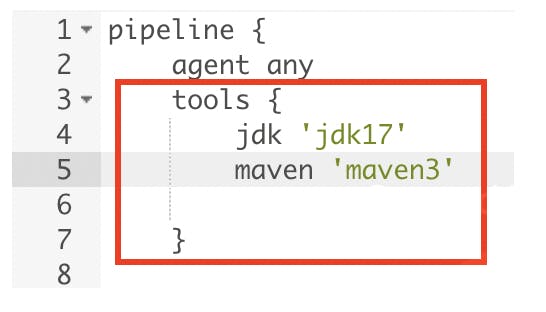
Define tools jdk and Maven so that they can have global scope in the pipeline and can be called from anywhere.
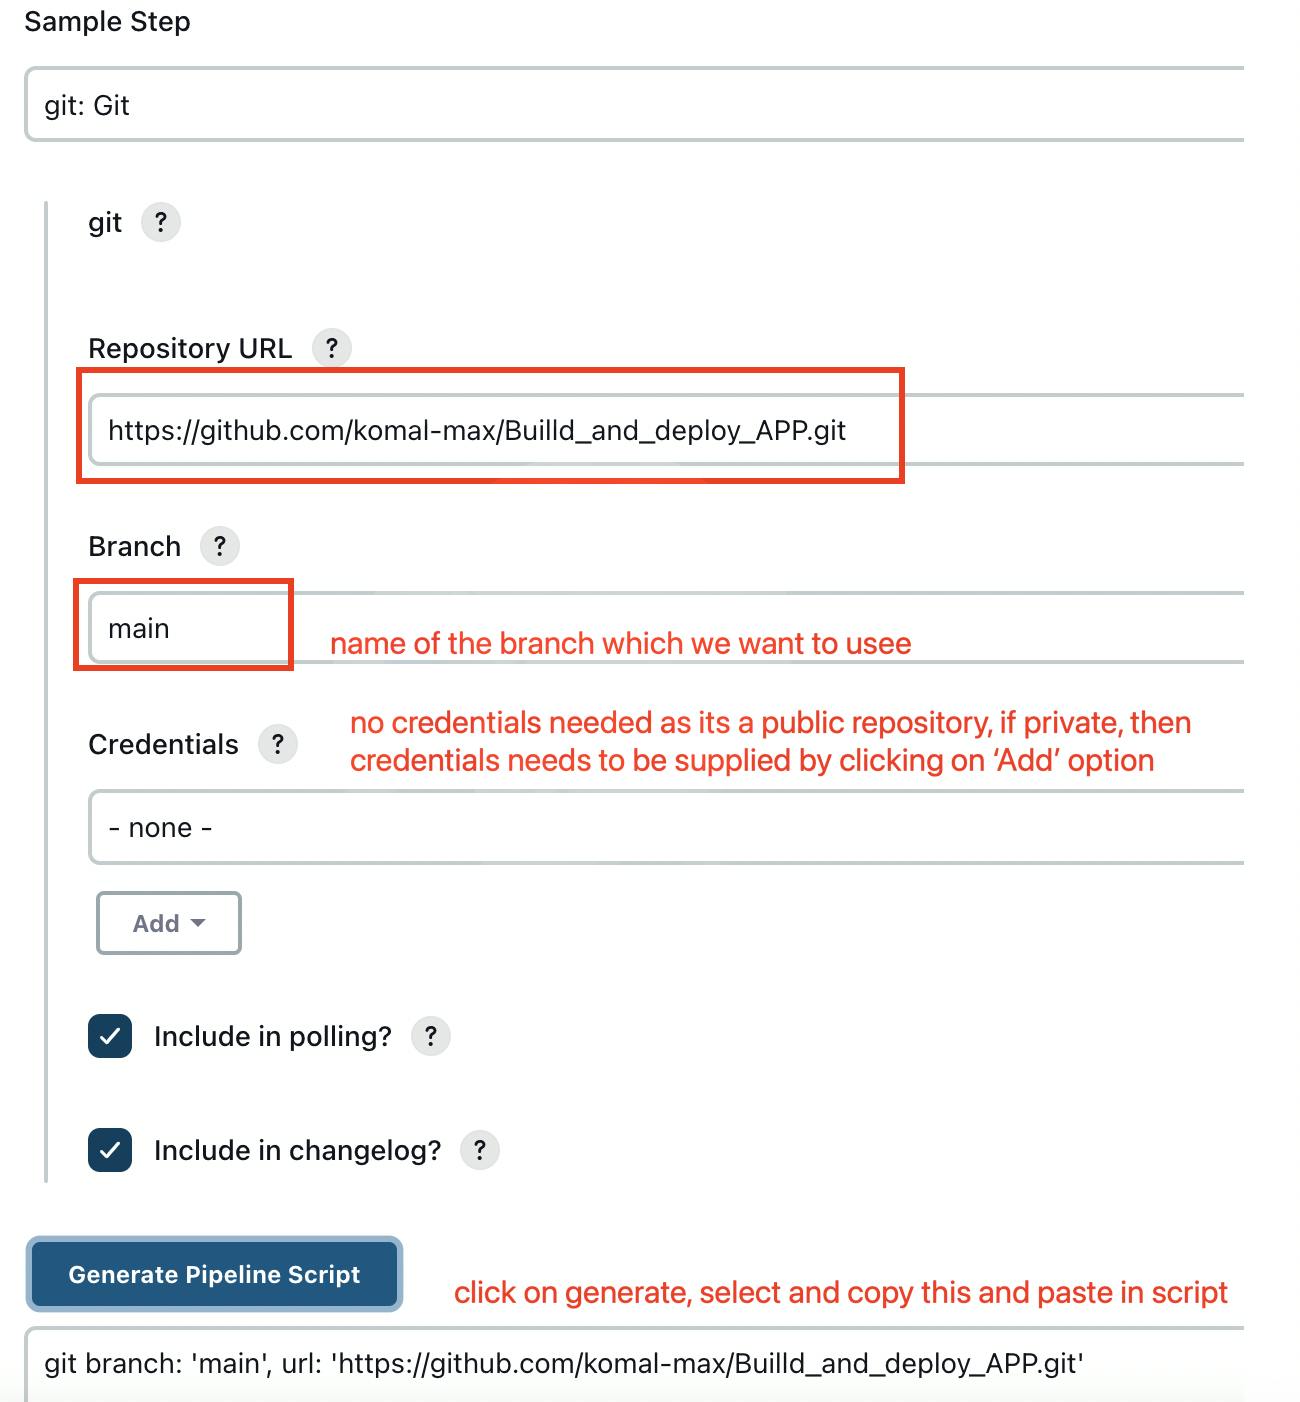
The first stage in the pipeline is 'Git checkout', this is the stage using which the local copy of the repository will be created inside jenkins.

If you are not sure about how to write the syntax then at select Pipeline Syntax option at the bottom, it will open as below and then make the necessary changes, copy the generated script and paste it back in the Pipeline script.
Code Compile
Code compile stage will help figure if there are any syntax based errors in our source code.

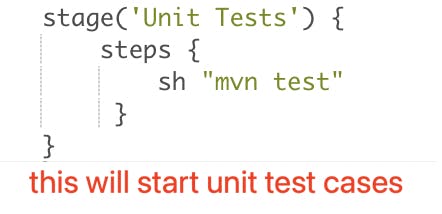
Unit test cases
Next stage is unit test cases which runs test cases to see if all test cases for our application are running fine.
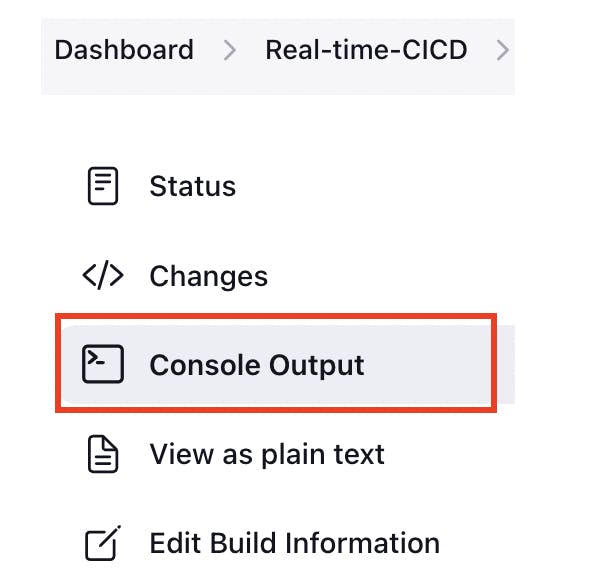
After configuring these steps, we can try running our first build. Go to Dashboard > click on name of your job, in our case its Real-time-CICD, on the left side, select Build Now, this will schedule the build and you will be able to see if the build passes or fails and you can also see logs using console output section.
Code Quality Checks using SonarQube Security tool
Now, we introduce SonarQube, a powerful tool used for code quality analysis. SonarQube identifies bugs, vulnerabilities, and code smells in the source code. Jenkins will generate a report with all detected issues, allowing developers to address them for better code quality.
To learn more about SonarQube, follow: https://www.sonarsource.com/products/sonarqube/
To configure SonarQube server on your local machine: Visit https://www.sonarsource.com/products/sonarqube/downloads/ and download the free community edition, next, navigate to the downloaded sonarqube folder > open bin folder, choose your O.S, for example choose macosx-universal-64, then open your terminal, cd to the folder which has sonar.sh and then run ./sonar.sh start, this will start the sonarqube service on port 9000 by default. To stop sonarqube service simply run ./sonar.sh stop.
If you would like to change the port on which sonarqube runs on your machine, simply navigate to the sonarqube folder > conf > open sonar.properties file and make the desired changes like below and then you can access sonarqube using http://localhost:8081/
On this page, we can now see the generated reports.

After installing Sonarqube, we need to configure sonarqube in jenkins first, Manage Jenkins > Configure system > search for sonarqube installations > add the below information, Note that the server authentication token step is explained below
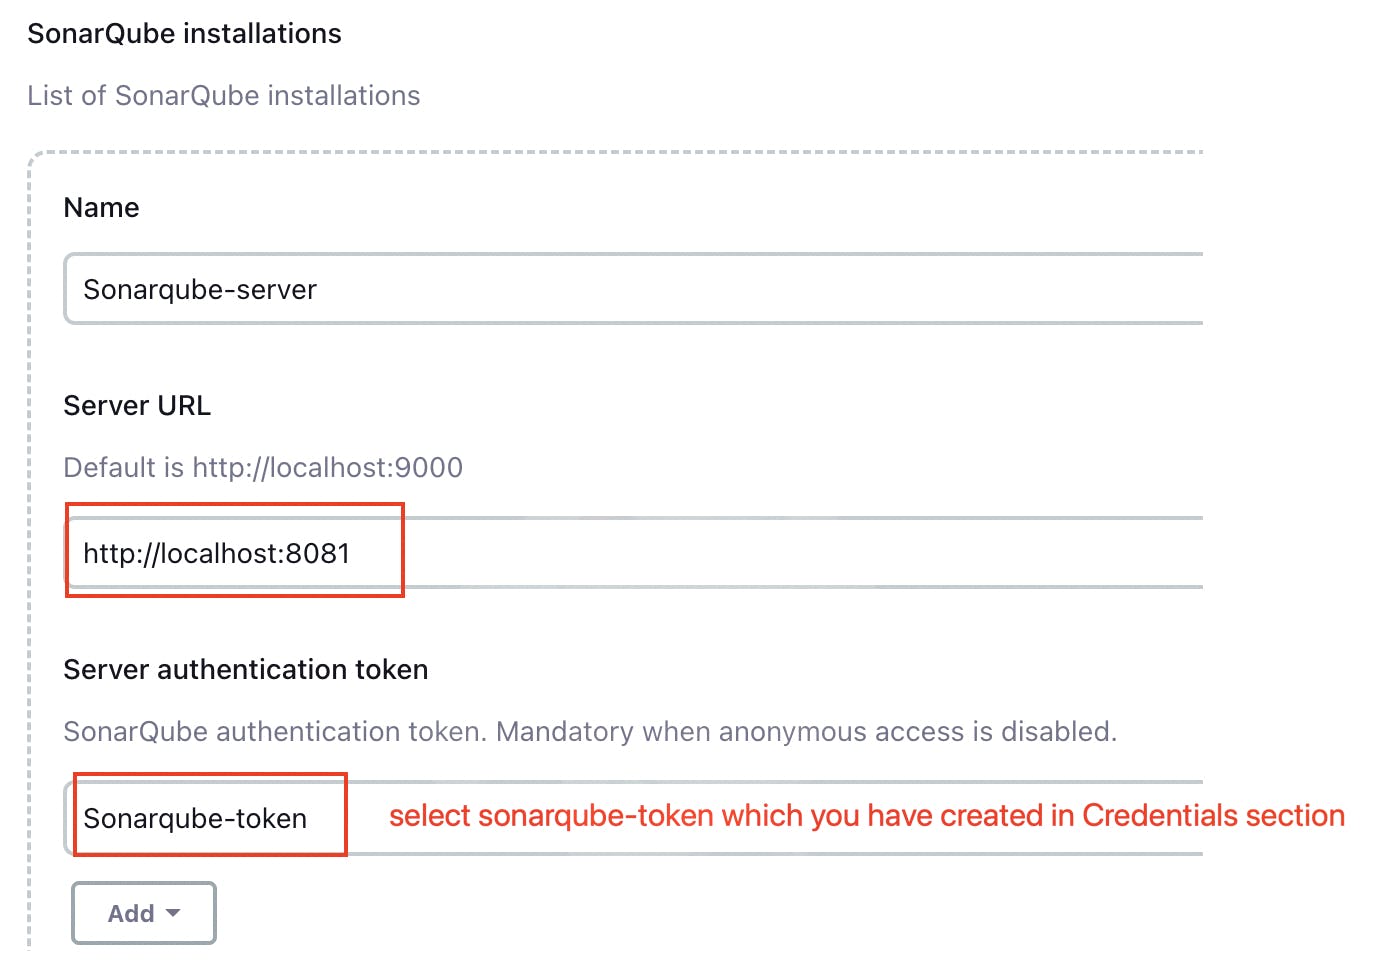
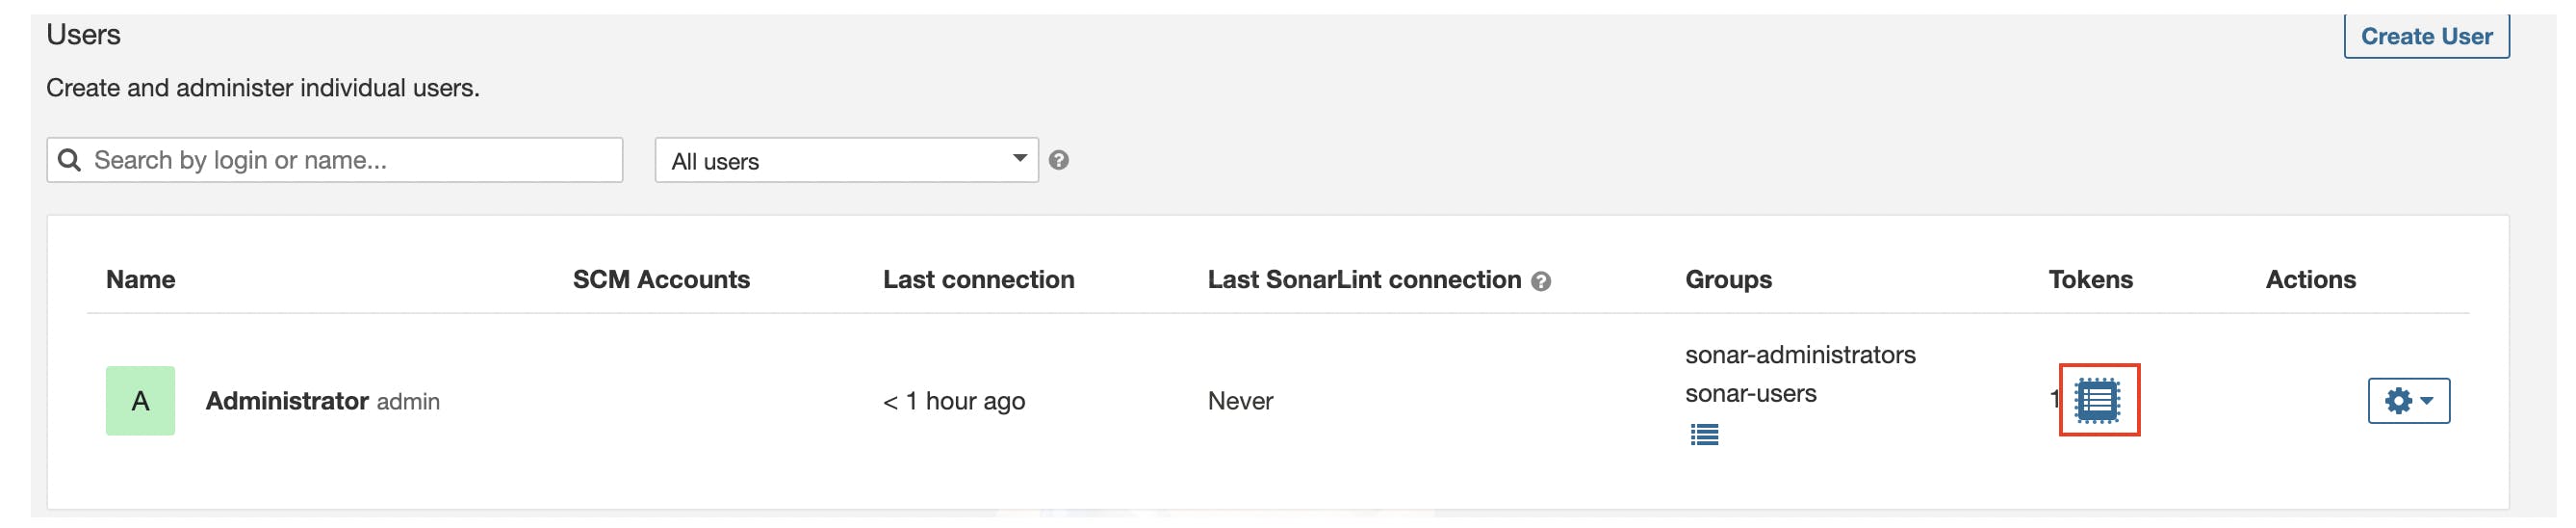
For authentication token, navigate to Sonarqube server > Administration > Security > users > click the icon under Tokens and then provide Name and expiry and then click Generate. Copy the token > go back to Jenkins > Manage jenkins > Credentials > click on Global > Add credentials > select kind as 'Secret Text' as we are adding a token > paste the token in Secret section > provide description Sonarqube-token.
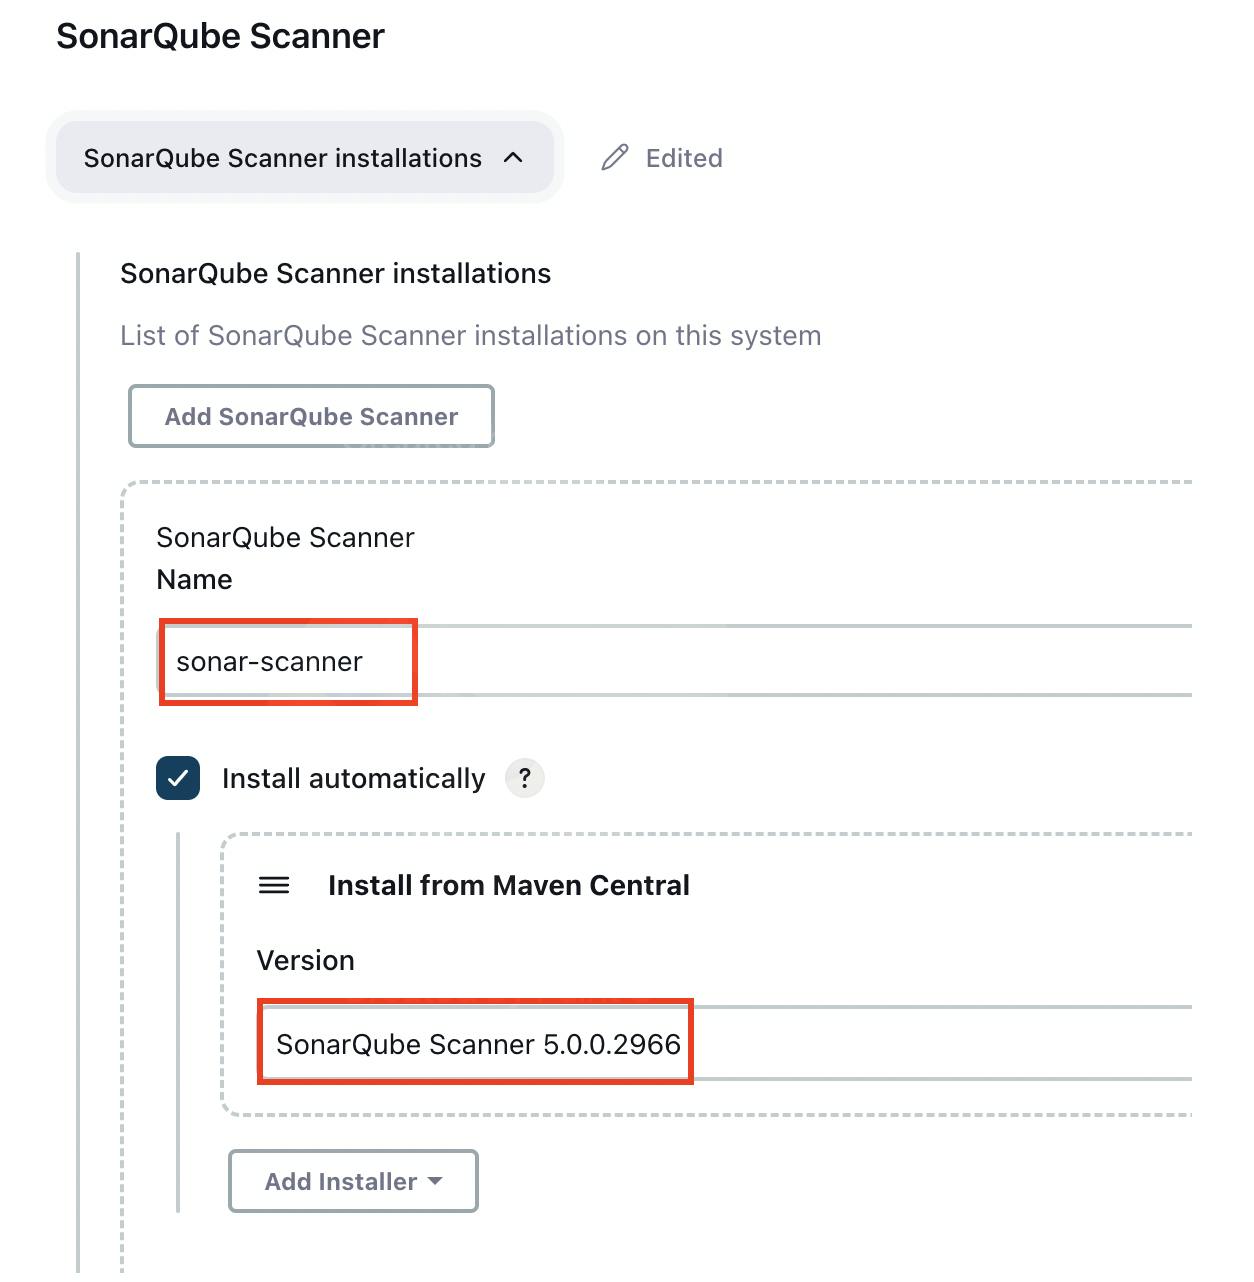
After this, we will configure tool we use for sonarqube, for this, go to Manage Jenkins > Tools > search for SonarQube Scanner > add sonarqube scanner and then provide name and select version.
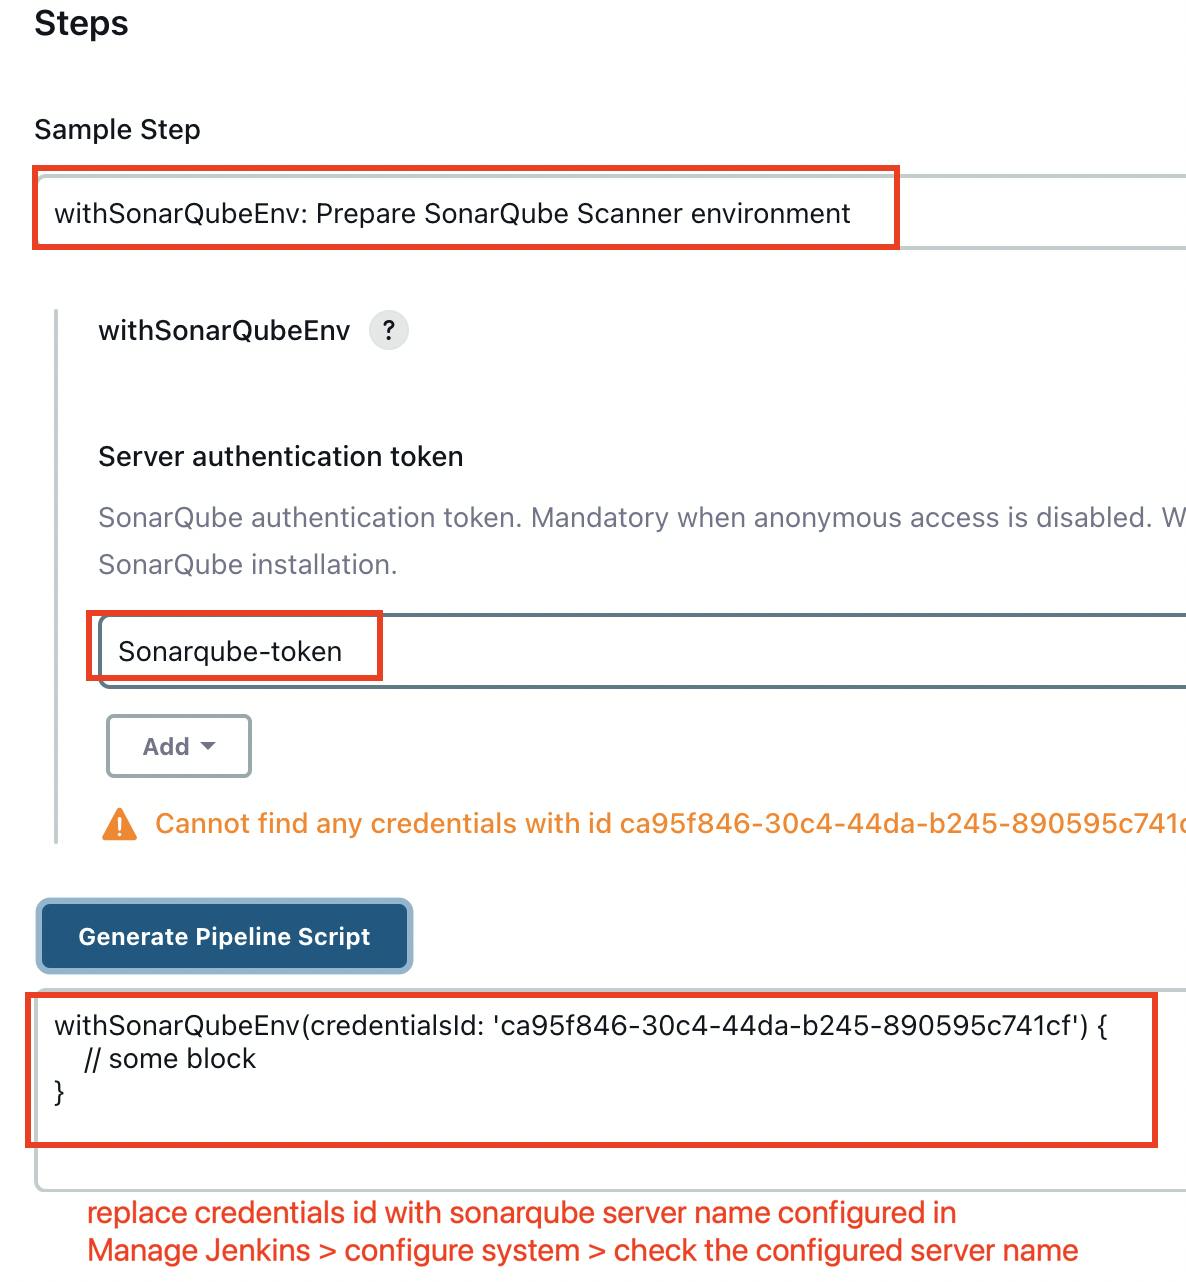
Now we need to add sonarqube in our pipeline. Create environment and then configure stage for sonarqube. Make use of pipeline syntax:
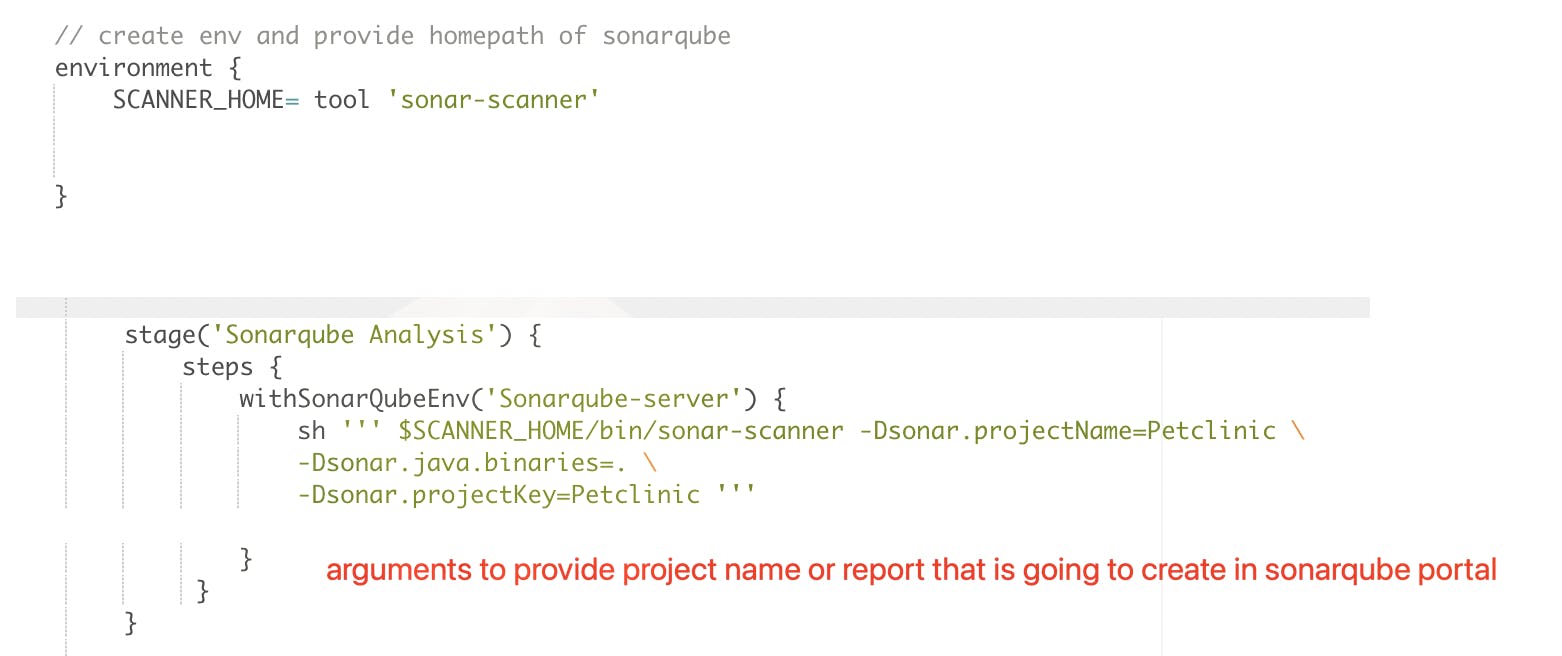
Save and run the Build. To check the report, navigate to Sonarqube server and then under Projects you will be able to see the report, to check the detailed view of report or any issues click on Project > Issues

OWASP Dependency Check
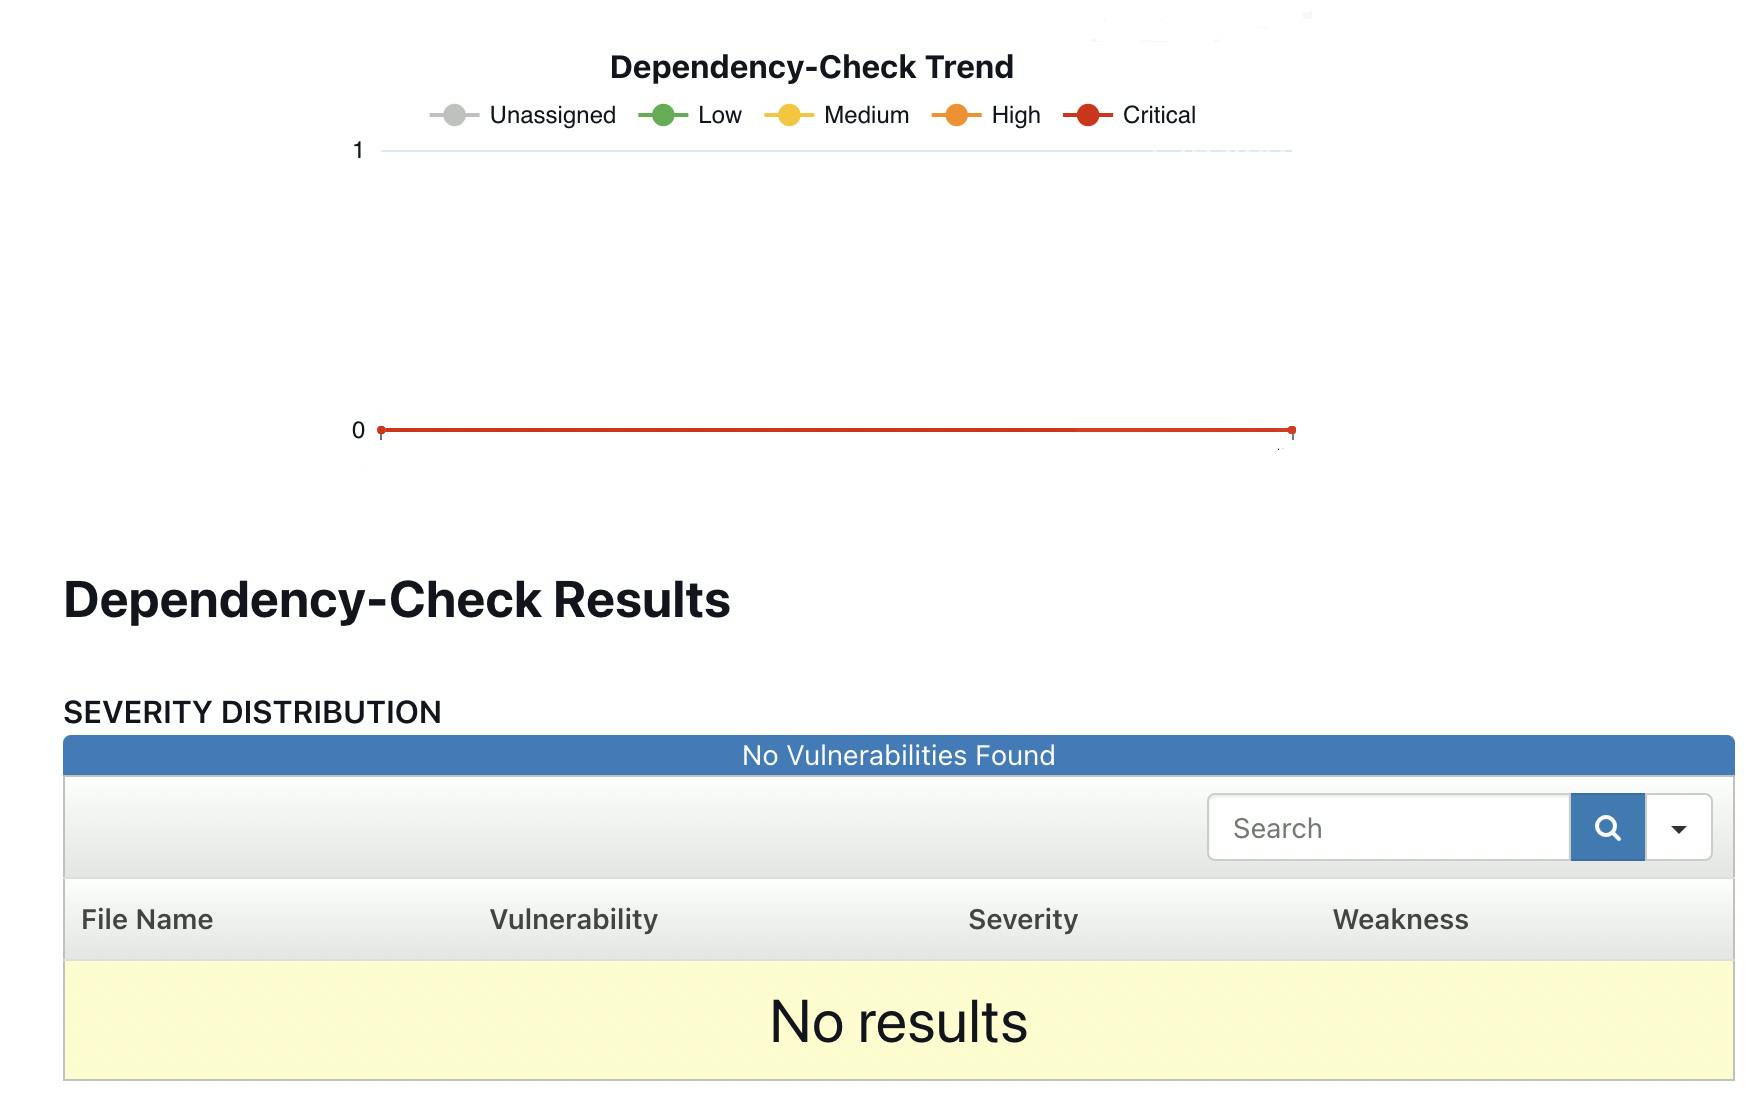
In this stage, Jenkins will leverage a tool called OWASP Dependency Check to scan the source code for known vulnerabilities. It scans the source code repo and creates a report which will show if there any known vulnerabilities in the source code and will categorize all the issues in severity based format.
To find out more about OWASP Dependency Check, visit: https://jeremylong.github.io/DependencyCheck/
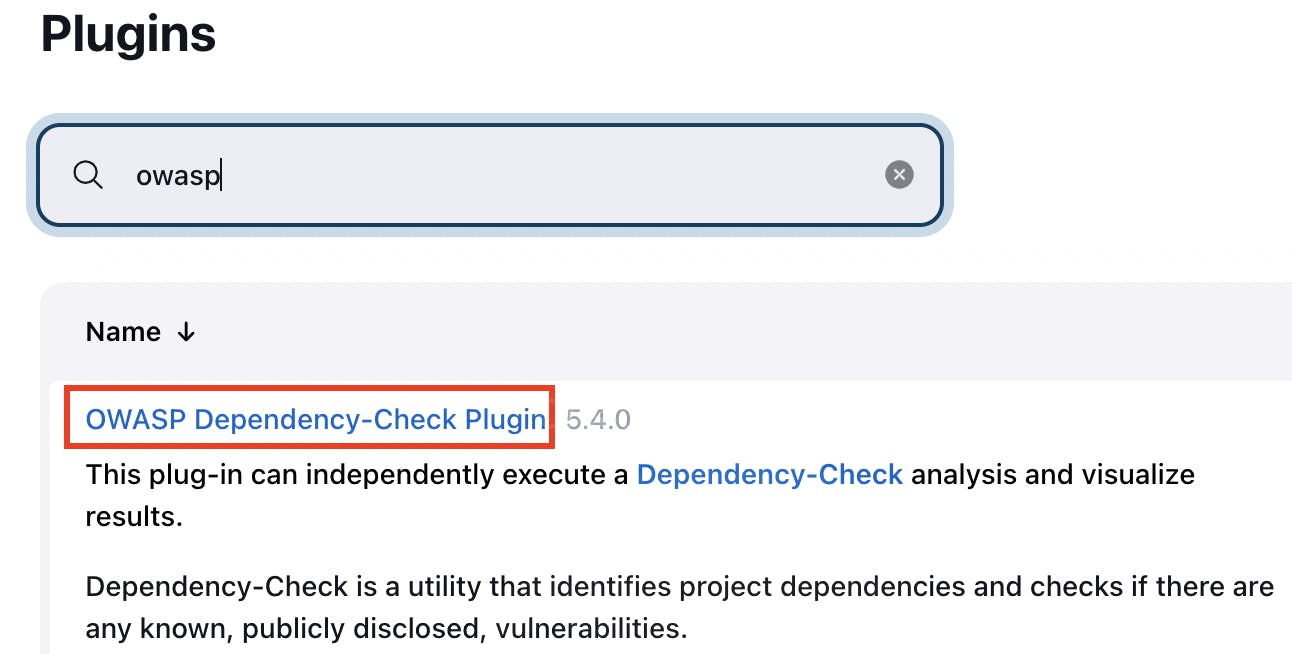
To install this, go to Jenkins> Plugins > install OWASP dependency check plugin > Install without restart
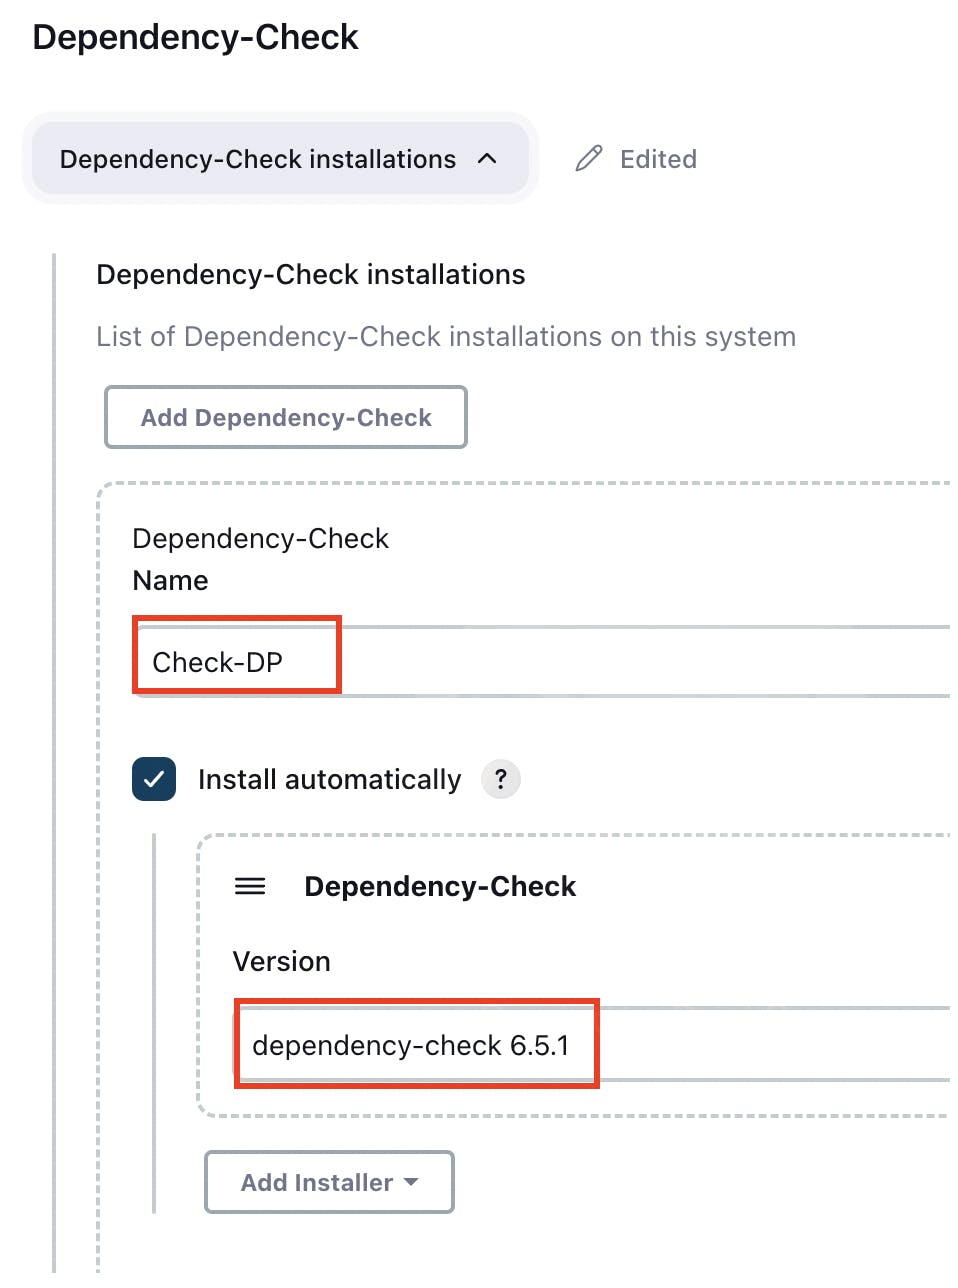
After installing plugin, navigate to Manage Jenkins > Tools and add dependency check like below:
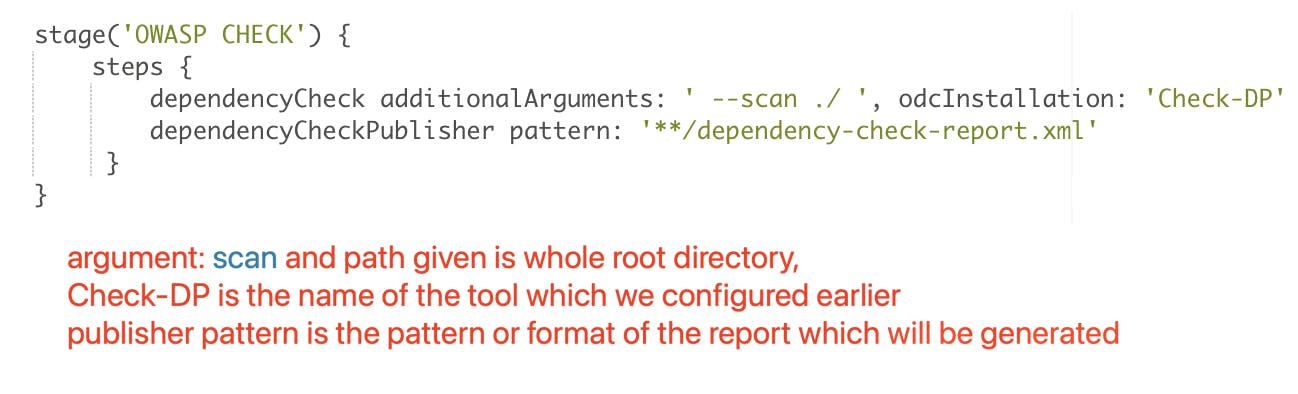
Now, navigate back to the pipeline to configure the stage as below:
Save & Apply and then trigger the Build. When running the first time, it will take some time as it needs to download lots of dependencies (ones which are having database of known vulnerabilities, it downloads from 2001 till now).
After the Build is passed, you can go to the build and navigate to the Dependency-Check section to see if there are any vulnerabilities found and a graph is also presented showcasing the different severity of vulnerabilities if found.
Code Build
To package our application, Jenkins will use Apache Maven, a powerful build automation tool for Java projects. Maven will generate the application's artifact, typically a JAR or WAR file, which will be used for further deployment.
To get started with Apache Maven, visit: maven.apache.org
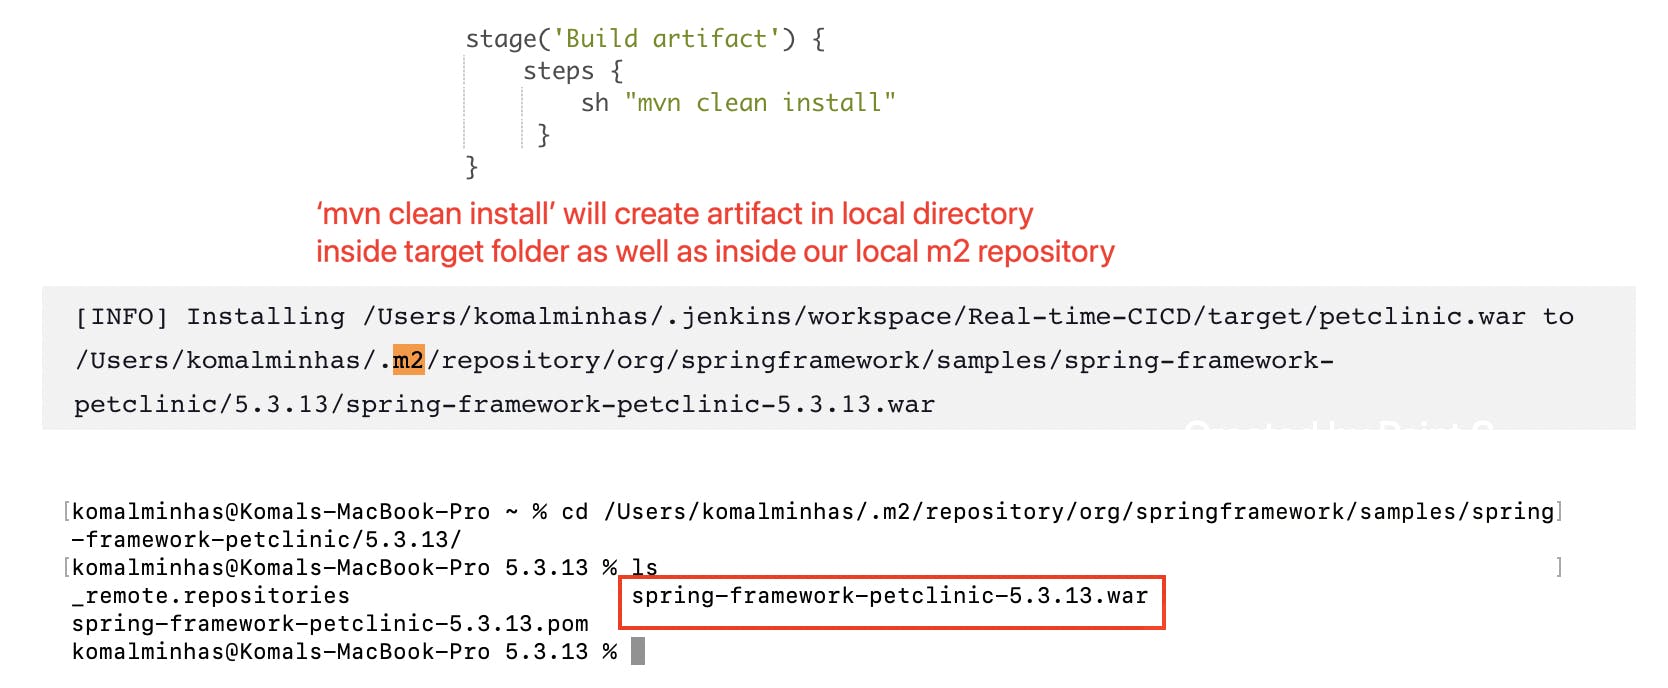
Later we will be using this artifact when we'll deploy the application to Tomcat.
Docker Build and Push
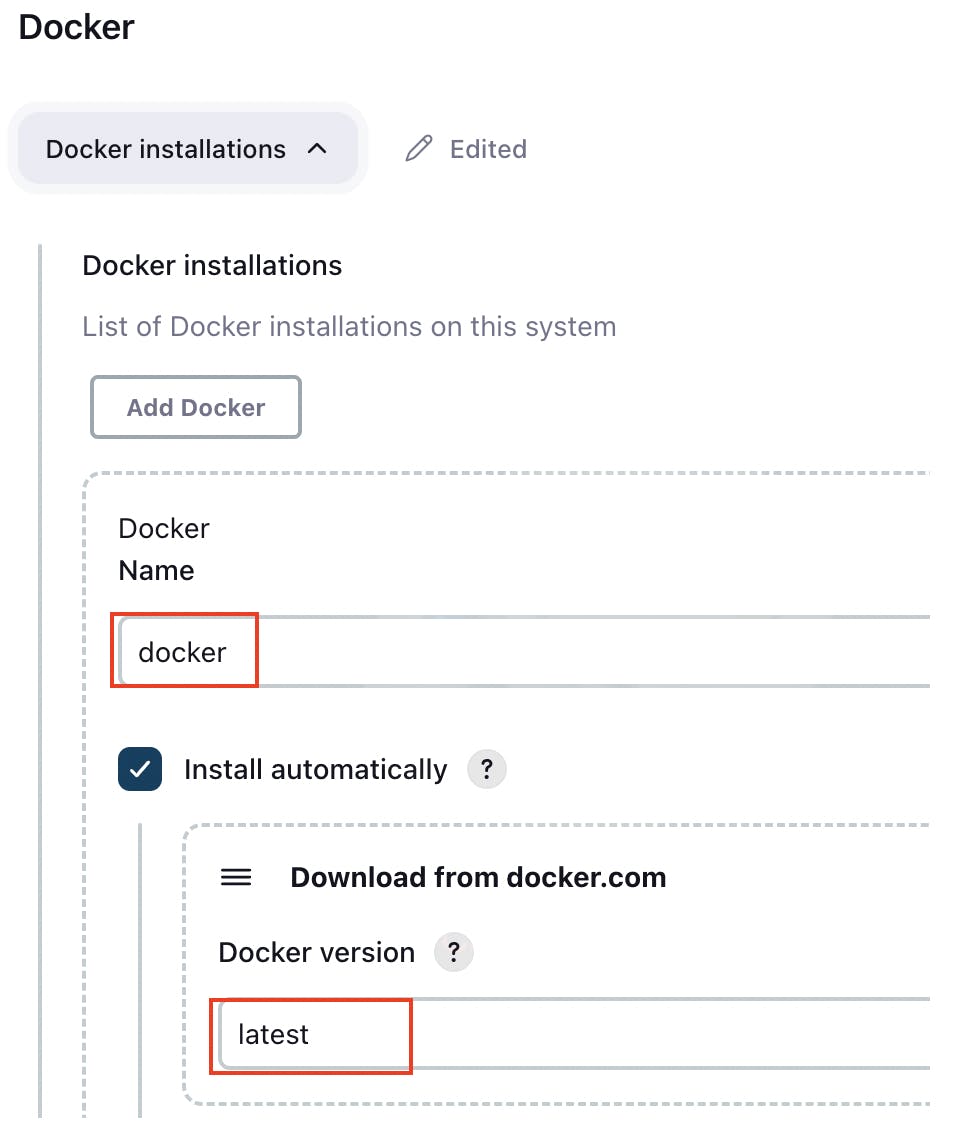
In this step, we will build our docker image and push it to a repository. First, we need to check if we have Docker tool installed in Jenkins, navigate to Manage Jenkins > Manage Plugins > install Docker, Docker Pipelines, Docker API, Docker-build-step > install without restart. After installing Plugins, navigate to Manage Jenkins > Tools > configure as below:
Next, make sure to add your DockerHub credentials in Manage jenkins > Credentials > under Stores scoped to jenkins, click on Global > add credentials > keep the scope Global > supply your DockerHub credentials i.e. your username and password > leave the ID section blank > add description as docker creds > save
After that, add Docker stage in the pipeline and run the Build. It will create a new image petclinic-new, we also tagged the image by providing our username/<name>:tag (we added tag as latest)

Now we will Push the image to our public repository.
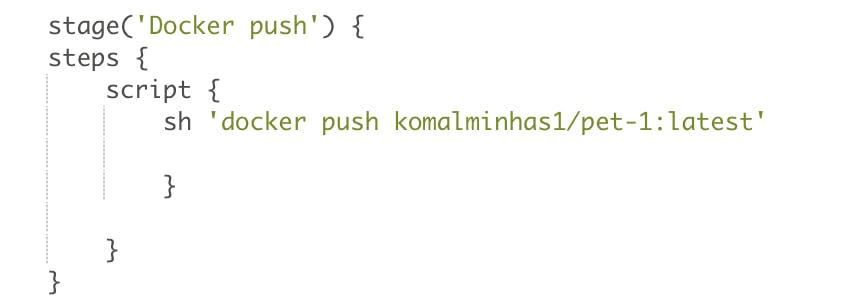
Save and run the Build again. You can also check the logs to see the build status and if the image is Pushed.
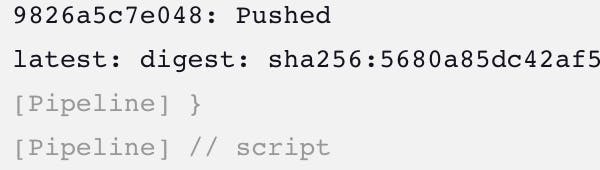
After the image gets pushed to Docker Hub, check your repository and you will find the image.

Docker Image Scan using Trivy
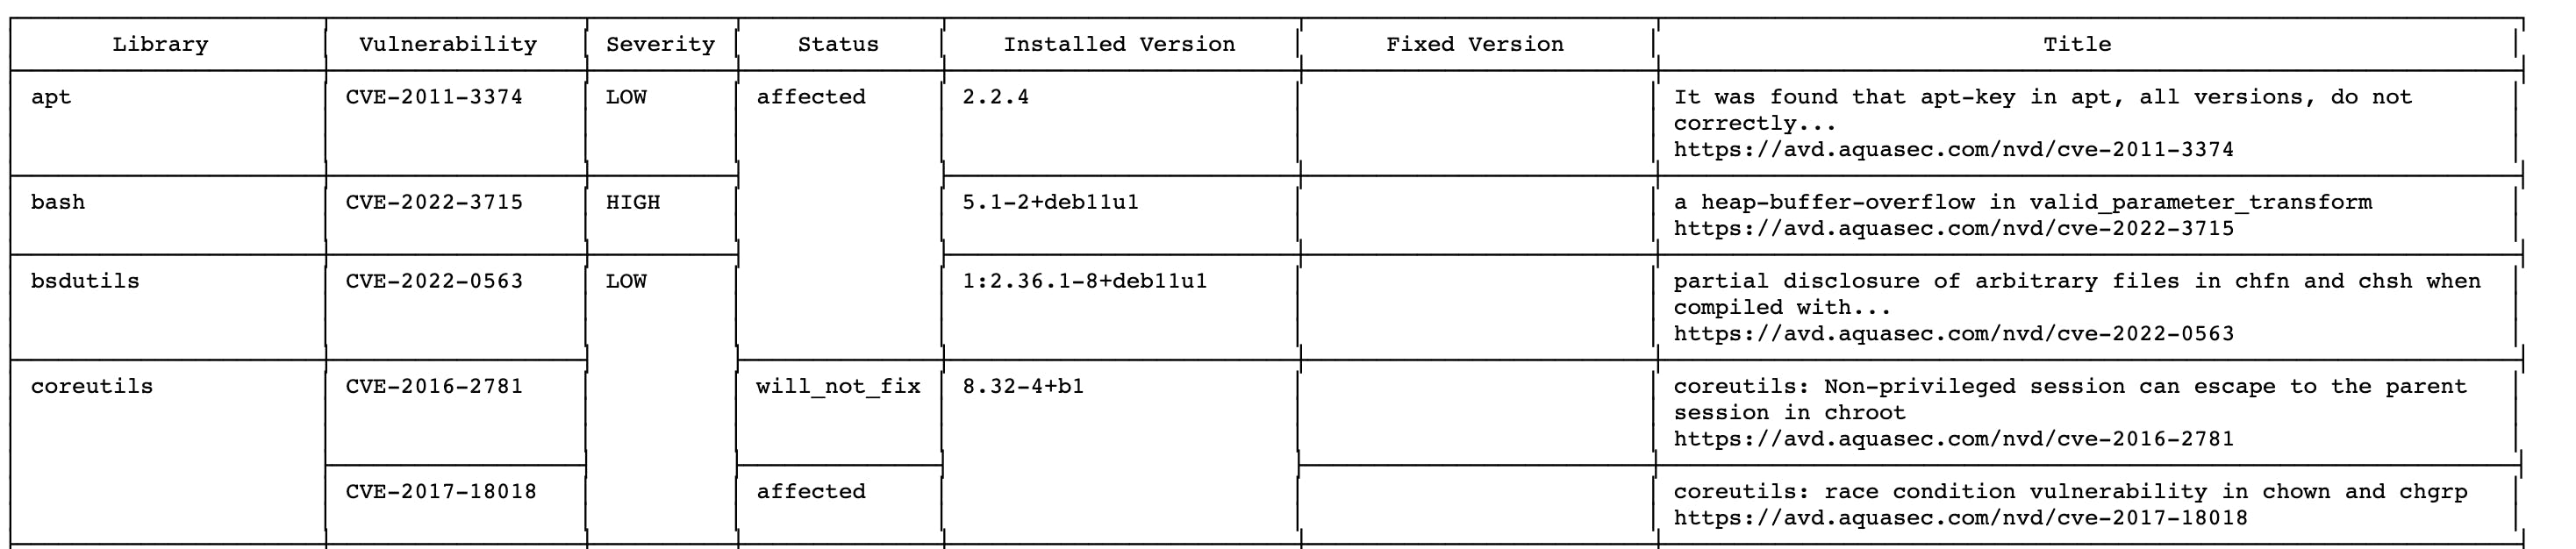
Trivy is an open-source vulnerability scanner specifically designed for container images. It helps identify vulnerabilities and security issues within the software packages and libraries that are included in your container images. Trivy focuses on scanning the operating system packages and application dependencies, providing valuable insights into potential security risks. To learn more about Trivy follow: https://trivy.dev/
To install Trivy in your local machine, use homebrew
brew install aquasecurity/trivy/trivy

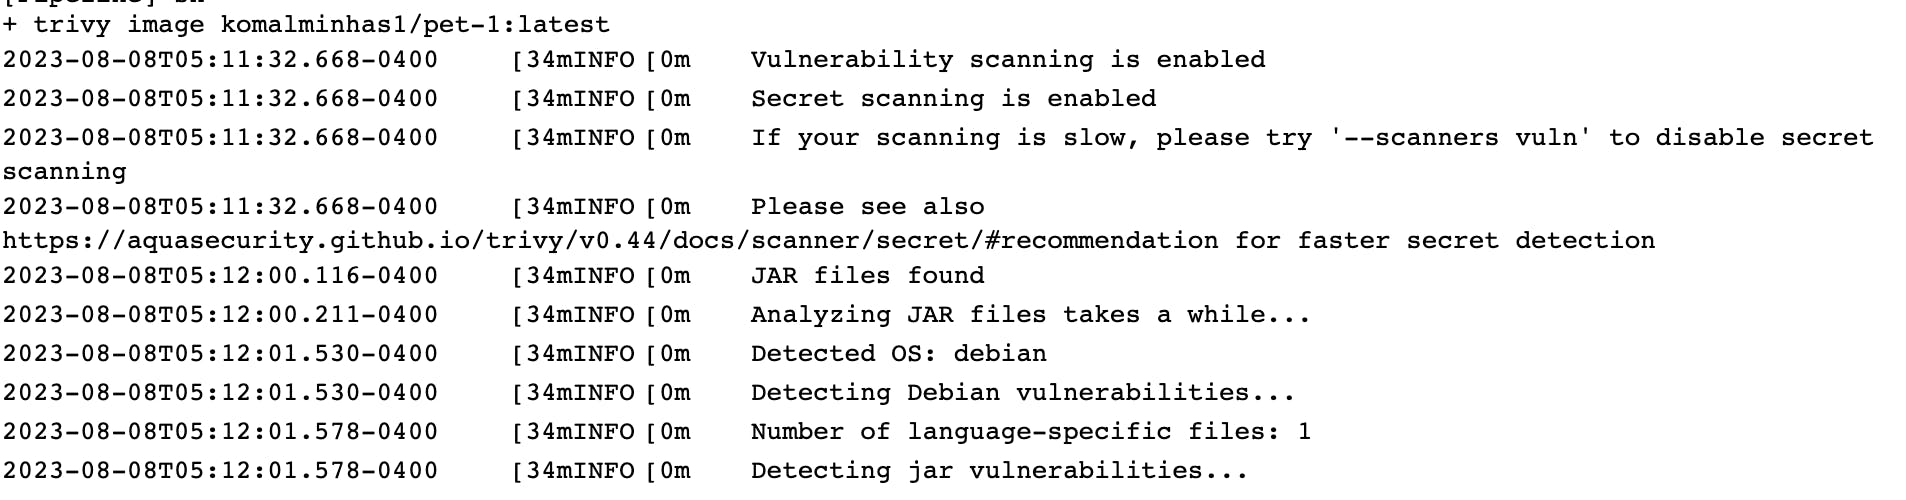
Make following changes to the pipeline, save and run the Build.
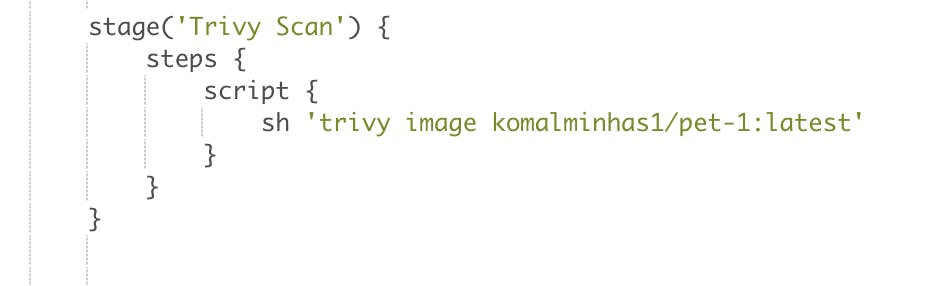
You can see something similar in the console output:
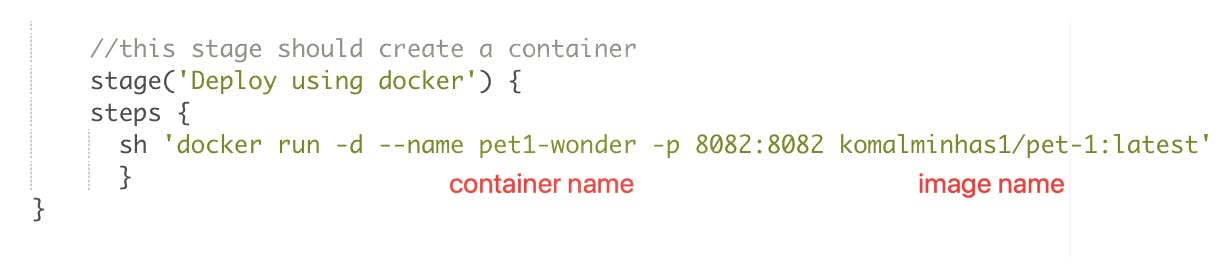
Deploy application to Docker container
We will create a container and access the image we created. Make the following changes in the pipeline, save and run the Build

we can check using docker ps-a command that a new container has been created
Deploy application to Tomcat Server
Download zip file to install Tomcat server from https://tomcat.apache.org/download-90.cgi. After downloading, unzip and click on file > Select New terminal at Folder > cd to bin folder, we need to execute startup.sh file but first check if it has execution permissions using:
ls -al \.sh*
if not, then provide necessary permissions using:
chmod +x \.sh.*
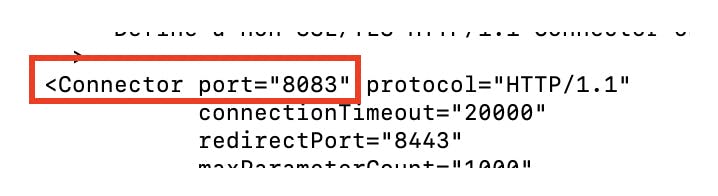
then, execute ./startup.sh to start the Tomcat server. Tomcat will run on port 8080 by default, if that port is already busy then you will need to change port for Tomcat server. Open terminal and navigate to tomcat folder > cd conf > open server.xml file using any editor, vi server.xml and make changes to the port, I am using Tomcat on port 8083. You can then access tomcat using: http://localhost:8083/
Inside the. tomcat server, we have a folder named 'webapps' inside which we put the .war file so that it can be deployed, so to find the path of .war file, navigate to your recent Build > workspace > on the right side you will get the path, in my case, its:

inside this we have 'target' folder and inside that folder we have 'petclinic.war' and this is the artifact which we need to put inside webapps folder of Tomcat.
Add the following in the jenkins pipeline, save and run the Build

check that the petclinic.war is copied inside webapps folder of Tomcat.

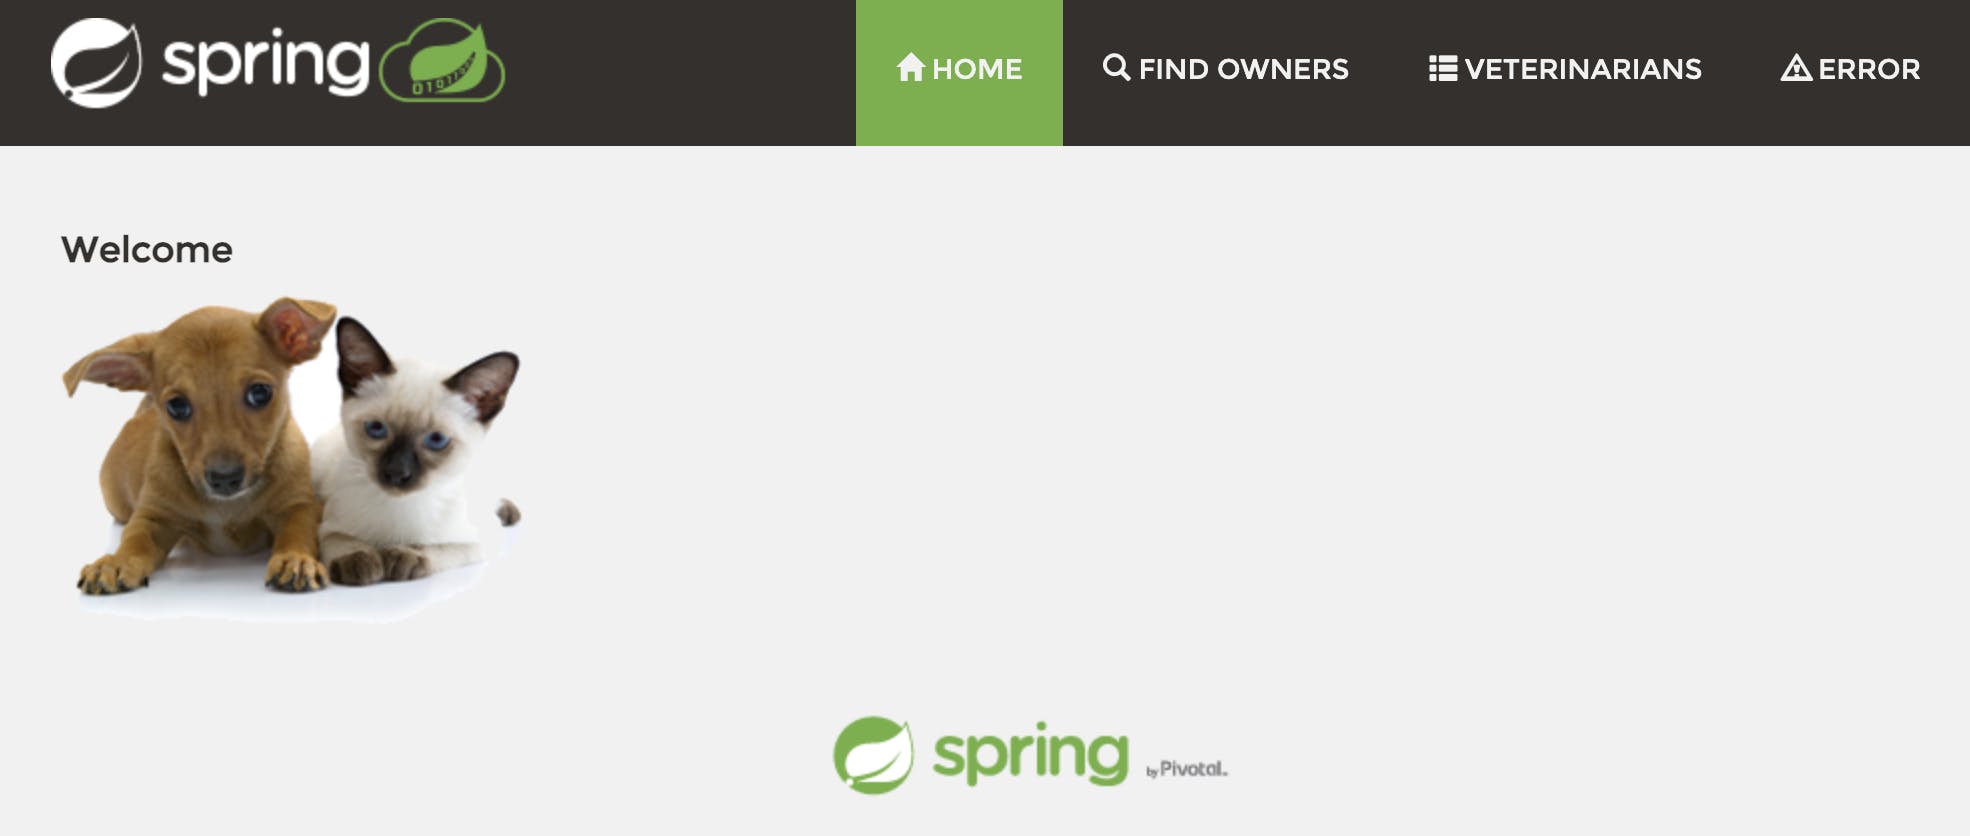
Now, access the application using: http://localhost:8083/petclinic/ and we can see that we can access the application successfully!
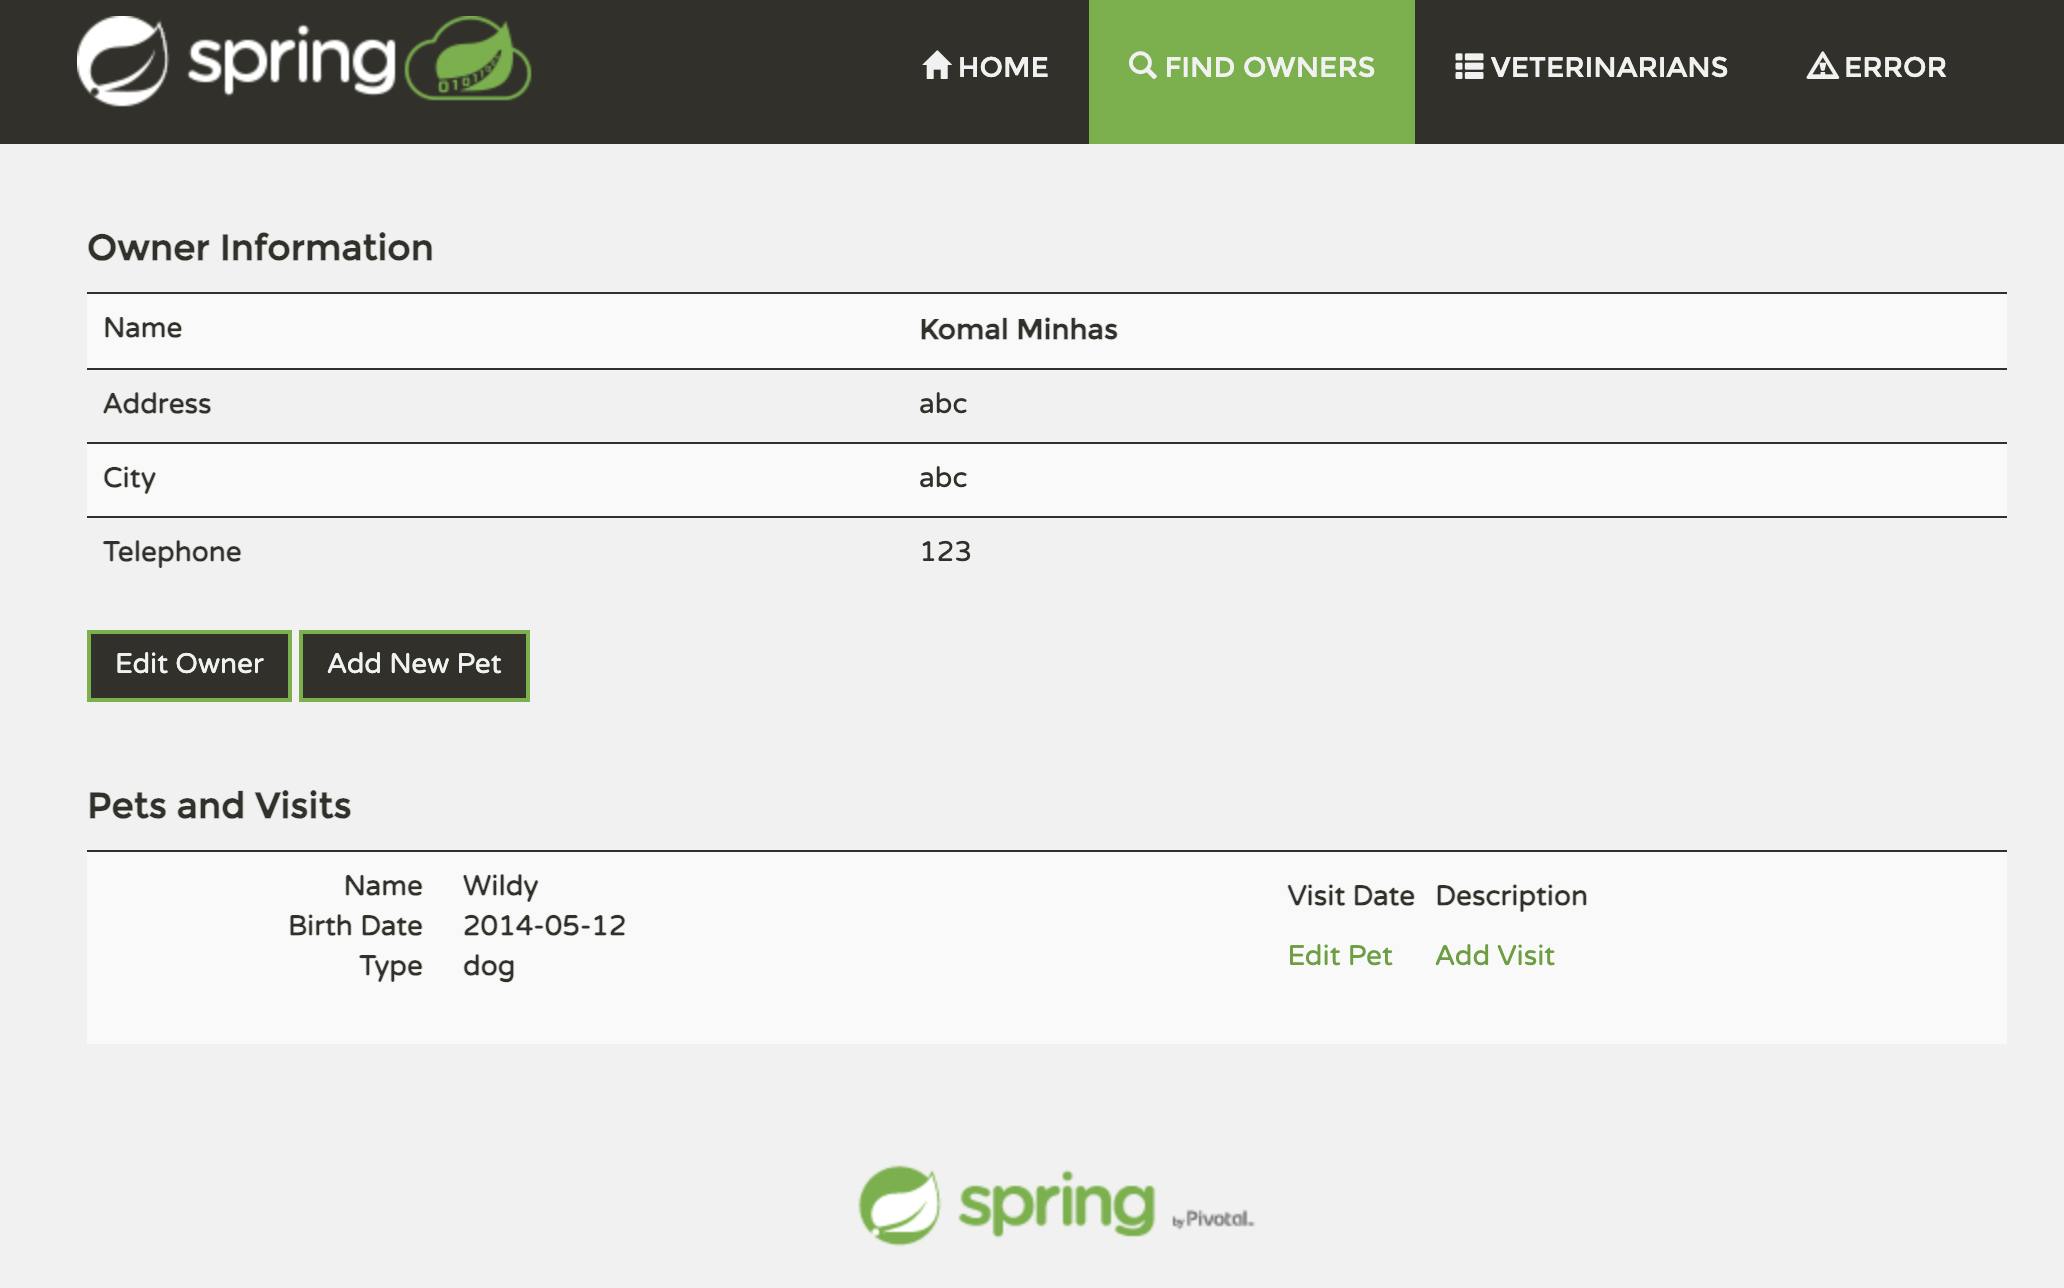
You can also add/update information here:
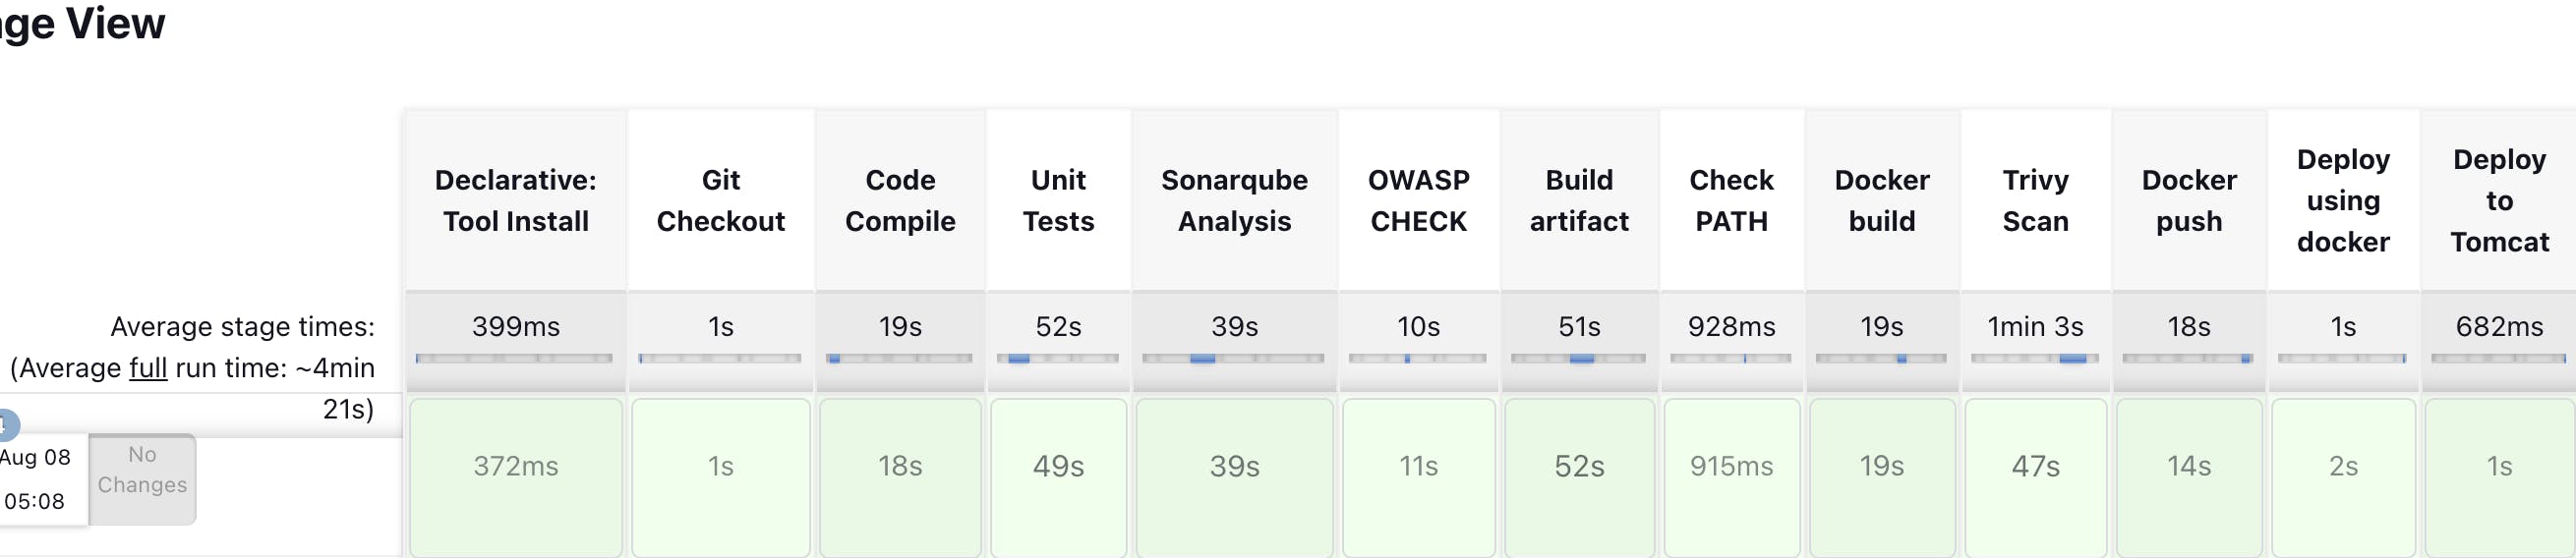
Final stage view of the pipeline:
Issues Encountered
While running the build in the early stages I encountered this error:
Error: LinkageError occurred while loading main class org.sonarsource.scanner.cli.Main java.lang.UnsupportedClassVersionError: org/sonarsource/scanner/cli/Main has been compiled by a more recent version of the Java Runtime (class file version 61.0), this version of the Java Runtime only recognizes class file versions up to 55.0
This means that there is an issue with the Java version mismatch. The issue started happening after I installed SonarQube server.
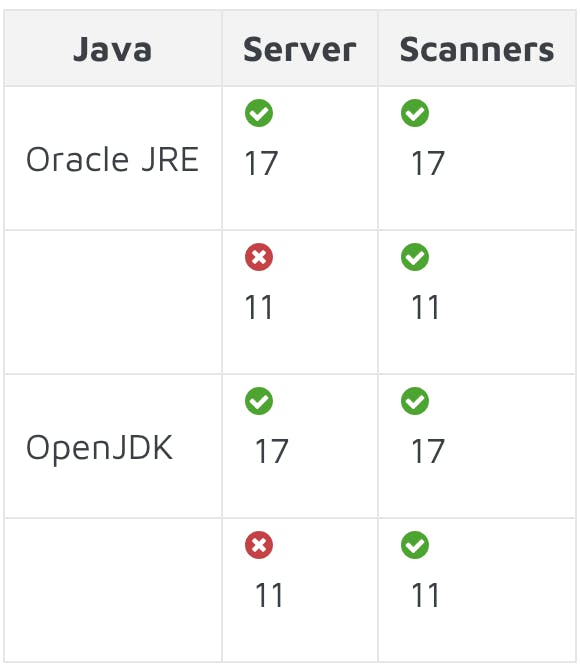
The SonarQube server requires Java version 17 and the SonarQube scanners require Java version 11 or 17.
To resolve this version mismatch issue, I installed jdk 17 on my machine and added jdk17 installation in Jenkins (earlier i had jdk11), also in jenkins pipeline I used jdk 17, ran the build again and the issue was resolved.

Docker Build getting failed
While trying to run Docker Build and push stage I was getting a very sticky issue, the build kept failing and the error message I was getting said:
+ docker build -t komalminhas1/testimage . /Users/komalminhas/.jenkins/workspace/Real time CICD@tmp/durable-64cde323/script.sh: line 1: docker: command not found
I verified my login credentials for Docker Hub I supplied to Jenkins and made sure they were correct, tried build again but somehow it kept failing. After going through some articles, I found a very helpful article here: https://stackoverflow.com/questions/40043004/docker-command-not-found-mac
If you are using a Mac and installed Jenkins via Brew, you will need to add Docker's path to
*/usr/local/Cellar/jenkins-lts/*2.401.3 /homebrew.mxcl.jenkins-lts.plist

save the file and run the Build again. It should run successfully now.
That's it! I hope you enjoyed learning so many interesting things that we can do in DevOps world. If you feel anything can be made better in this project or you find any issues or run into any problems, please feel free to let me know. I am also adding a list of references from which I took inspiration and guidance for this project.
Happy Learning!